Today’s headband DIY is how to make a Double Strand Headband. This headband is made almost exactly the same way as the Single Lace Headband.
All you need is 36 inches of lace or ribbon 1 inch width or narrower. I used 1/2 inch width lace from Joann’s Fabrics.
3 1/2 inches of braided elastic 3/8 inch width or larger.
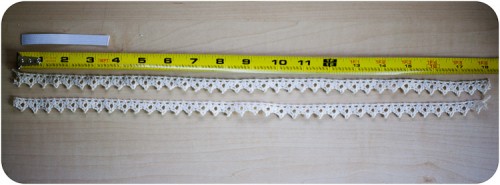
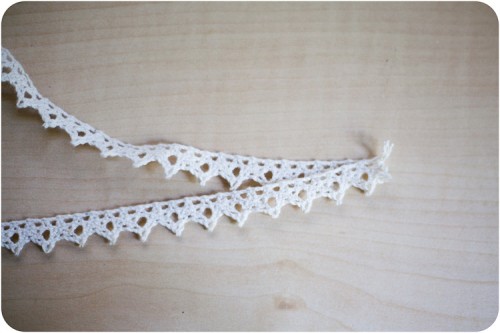
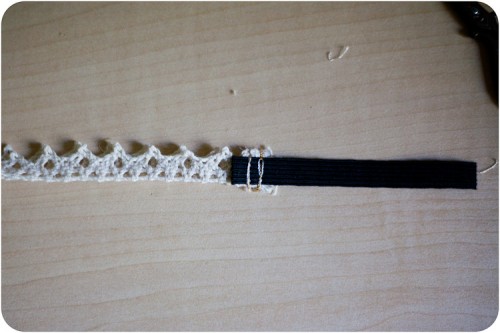
Lay the end of one length of lace over the other as the picture shows.
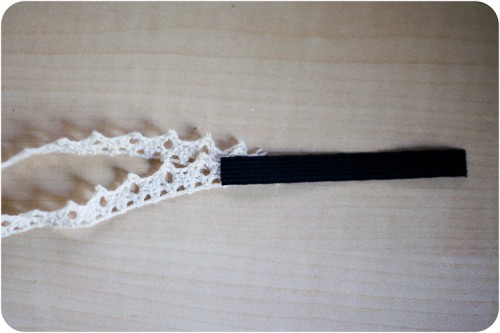
After you have the ends lined up lay the elastic over the top so they overlap by 3/4 of an inch or so.
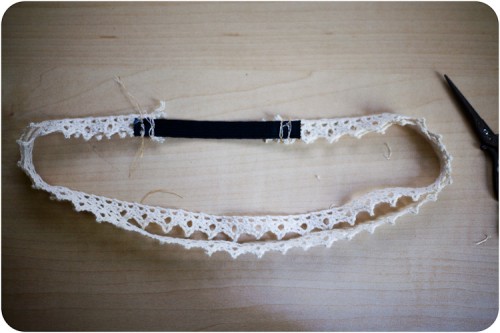
Then with a sewing machine or by hand stitch across the two layers of lace and the elastic. I went over my stitching three times and then added a second row of stitching to reinforce the headband. Lace has a tendency to unravel.
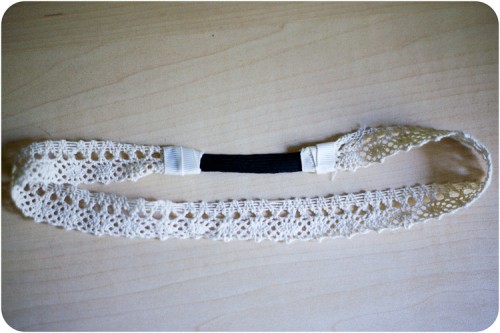
After you have sewn one side do the same to the other side. Make sure that you straighten out your lace. Here is the finished look.
I leave mine this way because usually the elastic and stitching are hidden by my hair. However if you want it to have more of a finished off look you can hot glue ribbon around the area where the lace and elastic are stitched together.
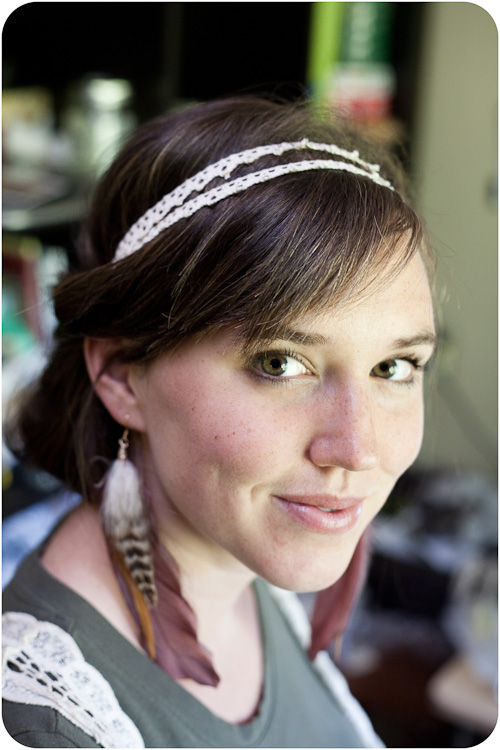
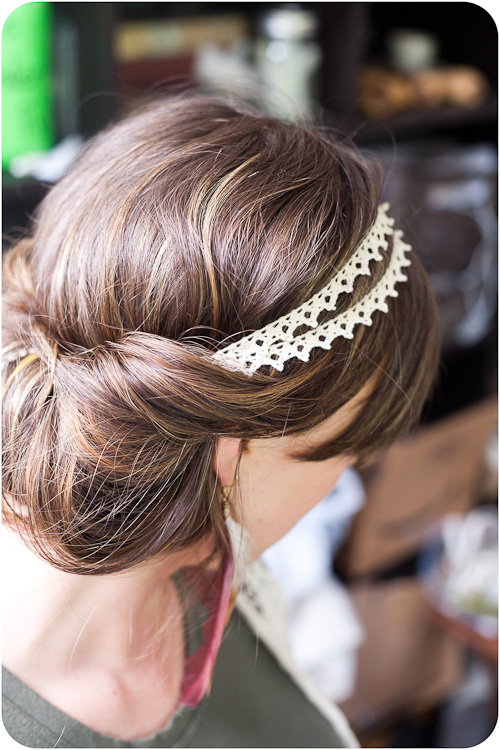
If you want to try a new easy Boho Hairstyle (TUTORIAL HERE) all you have to do is put the headband on top of your hair (while your hair is down) and then grab your hair at the back and tuck it into the headband. The messier the better!
utterly enchanting. i am in love with this lovely hairdo, so simple and pretty.
Love it! I also love your hair! You should do a tutorial on how to fix your hair like this also.
Agreed! I want to know how to do your hair! So pretty!
Woops! I got too excited about the cute hair. HAHA. I went back and read closer. Now I KNOW!
DUDE! i just tried your neat hair do trick with a regular headband and it totally works! my hair looks awesome and all i did was tuck it back in to the headband elastic. you are so genius!
YAY! It is amazing right? I love how easy it is. I am glad it worked for you!
Thank you for this beautiful headband tutorial! I’ve been wanting to make one! Your hairstyle is so pretty & perfect with this headband!
Love It!!! I have really curly hair and some days i just need to put it all up. This is a super cute way for me to do that. Thanks!!!
So cute! Thanks for the tips on the hairstyle, too. I can never get that cute-messy look…it tends to go too far toward the messy side. =)
I understand that for sure. I am continually thankful that messy is in 😉
thank you for such a pretty make. made mine this weekend and am now proudly wearing it. will be making more I’m the future.
This is so lovely! I’m having a Hip-ster party to celebrate my upcoming hip replacement and this seems like just the headband to make for my outfit!
I laughed so hard at this…what an AMAZING idea! Good luck with the hip replacement!
Goodness me. I hadn’t seen that anyone replied to this in well..months. Luckily my hip replacement was postponed until this Friday (Oct 14) so your well wishes are very very appreciated!!!
LOVE this! Just saw this and came over from Pinterest. So glad I did. I’ll be making this with my girls this weekend. Thanks so much!
[…] | No comments Another headband tutorial! Be sure to check out the Single Strand Lace Headband and Double Strand Lace Headband. For this tutorial this is what you will […]
Thanks for this! I love the messy look with the hair tucked in at the bottom… so easy, and looks so nice! I’ve been wearing my hair like that for the past few days and getting SO many compliments! Thank you!
so sweet, thanks for sharing! must do this
Oh! This looks like a fairy’s headwrap. I think I shall make one tomorrow.
LOVE that! I’m totally running to the store in a bit so I can make the headband. Thanks!!
[…] recently found a tutorial for a beautiful lace headband and I knew I had to try it. Turns out, it’s really easy to make […]
Any tips on the hair?! This is the style I want for my upcoming wedding. The headband is a perfect touch. Thanks a bunch!
What I meant was…does it keep the headband from sliding? I’m worried it’d come right off my head. I shall give this a try though!
this is awesome!!!
[…] hairstyle to your repertoire somewhere between “ponytail” and “wig.” via Elisa Joy (the tutorial is at the end of the post, right after the DIY for the adorable […]
ADORABLE! Thanks for sharing this!
I have crazy hair – fine and lots of it – so it always tends to look messy an dflyaway and NEVER looks good in the morning. I just popped a headband on to test this style method out, not expecting much since my hair is slept-on and unwashed, i.e crazyhair. I am so surprised! It looks great! I am even going out in public! (This is a miracle, believe me…) Thanks so much for such a simple, elegant style. I cannot wait to try it out on clean hair. Hehe!
I would love to know where you bought your lace trim! Love this DIY, thanks!
I bought it at JoAnn’s fabrics.
How do you keep your hair from slipping back out?
Some of it slips out but it adds to the boho look. Usually if the hairband is tight enough it should stay.
I saw this on Craftsy! I absolutely love it! It will be the perfect accent for my daughter’s renaissance dress I made for Halloween! I plan on matching the lace and adding some curls to frame her face.
Sounds lovely! I hope to hear how it works out. Thanks for the comment.
I love the headband but i’m head over heels for the hair style!!! I tried it, and IT WORKED! Seriously it looks like its actually suppose to! This is something new for me! It was so easy! And i have that EXACT lace for the head band! And i’m just about to buy thin elastic for another one of my projects! Hopefully I’ll have enough left over and I’ll make the head band to complete the look! Thanks so much!
Is there a tutorial for how to do this to my hair. I love the picture and really want to know how to do this style. Please share 🙂
[…] “elisa” […]
I love this tutorial and the hair style you showed at the end! Only problem is that my hair is slightly on the longer side, so when I tuck it in it looks awkward D;
[…] Ici le lien du site pour les instructions : Elisa Mclaughlin […]