Lace Headband Tutorial
This is the first of a few fun headband tutorials. A single strand lace headband.
This is seriously the easiest project EVER!
Cut 18 inches of lace (or ribbon) I bought mine at JoAnn’s Fabrics in the bulk ribbon and lace section.
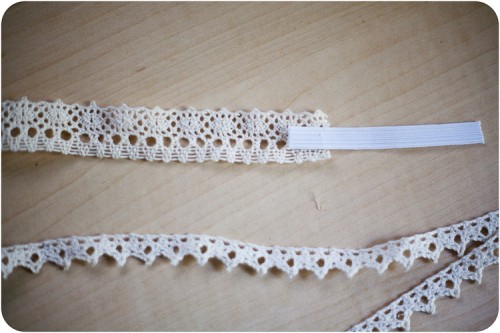
Also cut a strip of braided elastic (3/4 inch width) to 3.5 inches. You can use narrower or thicker elastic if you prefer. I used what I had on hand.
Lay the elastic a half an inch over the edge of the lace.
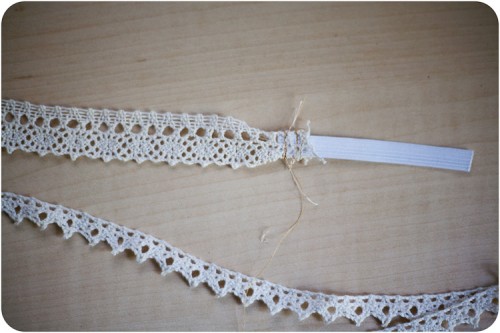
Hold the lace and elastic and sew the ends. You can hand sew, machine sew, or glue them together. If you sew with a sewing machine I recommend stitching back and forth twice and then sewing a second set of stitches to reinforce again. The lace tends to unravel so this makes it extra secure.
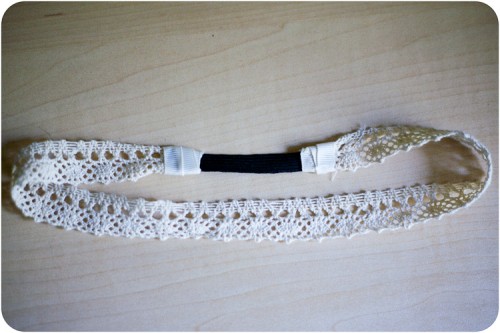
Keeping the lace flat do the same to the other side. If the lace is thicker than the elastic it helps to fold it around the elastic.
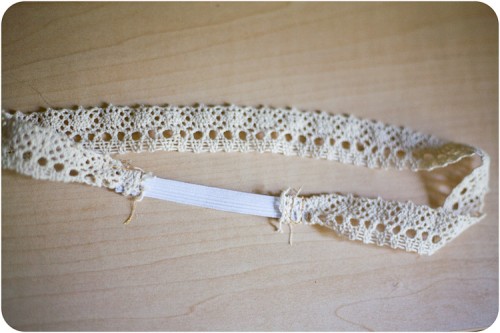
I have been making headbands non-stop I have lots more ideas using the same dimensions as this first tutorial so check back. Here is another picture of the headband being worn.



That is super cute! I have been looking for a headband like that forever! Do they have that type of lace/ribbon at michael’s? Thank you!
I’ve found the ribbon at Hobby Lobby.
Thanks!
[…] August 4, 2011 in Uncategorized by elisa | No comments Today’s headband DIY is how to make a Double Strand Headband. This headband is made almost exactly the same way as the Single Lace Headband. […]
[…] 12, 2011 in DIY by elisa | No comments Another headband tutorial! Be sure to check out the Single Strand Lace Headband and Double Strand Lace Headband. For this tutorial this is what you will […]